Monday, October 26, 2015

Common iptables commands

A few years ago I wrote a iptables tutorial explaining the basics of the topic. This post is just a small cheat sheet of most simple and effective commands that I end up using very frequently. I am assuming that we are operating for IP 1.1.1.1 and using INPUT chain of the iptables.
  1. Block an IP
    iptables -A INPUT -s 1.1.1.1 -j DROP
  2. Block an IP range
    iptables -A INPUT -s 1.1.1.1/24 -j DROP
  3. List current rule set
    iptables --list
  4. List current rules set with numbers
    iptables --line-numbers --list
  5. Delete a rule by rule
    iptables -D INPUT -s 1.1.1.1 -j DROP
  6. Delete a rule by number
    iptables -D INPUT 7
  7. Save iptables rules to a file
    iptables-save > iptables.dat
  8. Load iptables rules from a file
    iptables-restore < iptables.dat

Thursday, October 22, 2015

The LVM Beginner's Guide

Logical Volume Manager (LVM) helps in managing disk partitions irrespective of underlying disk layouts. In simple terms, this helps in extending a filling partition easily by just adding a disk. This is very useful in cloud based environments where adding a disk is very easy but extending a partition, if it is not LVM, might be very difficult.

Components of LVM:
  1. Physical Volume (PV): These are the underlying disk partitions that builds up to volume group. 
  2. Volume Group (VG): Analogous of an actual disk drive. A bunch of partitions (PVs) will combine to build a volume group. 
  3. Logical Volume (LV): Analogous to partitions on a disk. They are carved out of volume groups. 
  4. Physical Extent (PE): The unit which makes up logical volume. The smallest amount of the disk that can be given to a logical volume and further additions are done in multiples of physical extent.

Installation:
On Fedora or Centos or Red Hat, do the following:
# sudo yum install lvm2

How to create a LVM?
  1. To prepare a disk for using in LVM, we need to create an actual partition and set the type of the partition as LVM. Assuming that the disk is attached to the system at /dev/sdb, following are the steps:
    # fdisk /dev/sdb
    This command will open the fdisk prompt. Type "n" followed by "p" to create a new primary partition. On a new disk, this would be the first partition, so hit "1". Accepting default for next prompts, until we reach "Command (m for help):" would be fine. Now we have a new partition.
    To set the type of partition as LVM, hit "t" followed by "8e".
    Finally, to write these changes to the disk, hit "w".

  2. The above exercise would produce a partition /dev/sdb1. We will use this to create a PV.
    # pvcreate /dev/sdb1
      Physical volume "/dev/sdb1" successfully created

    Let us check out what we created:
    # pvdisplay
    "/dev/sdb1" is a new physical volume of "15.00 GiB"
    --- NEW Physical volume ---
    PV Name /dev/sdb1
    VG Name
    PV Size 15.00 GiB
    Allocatable NO
    PE Size 0
    Total PE 0
    Free PE 0
    Allocated PE 0
    PV UUID tAo1Xk-1N5g-Q9EM-1s7h-EinR-lFv5-DSgkLe


    Note that the VG Name line is empty which signifies that this PV is currently not a part of any VG.

  3. Now let us create a volume group and add the PV created in previous step.
    # vgcreate testvg /dev/sdb1
      Volume group "testvg" successfully created

    Let us check out the VG, we just created:
    # vgdisplay
    --- Volume group ---
    VG Name testvg
    System ID
    Format lvm2
    Metadata Areas 1
    Metadata Sequence No 1
    VG Access read/write
    VG Status resizable
    MAX LV 0
    Cur LV 0
    Open LV 0
    Max PV 0
    Cur PV 1
    Act PV 1
    VG Size 15.00 GiB
    PE Size 4.00 MiB
    Total PE 3839
    Alloc PE / Size 0 / 0
    Free PE / Size 3839 / 15.00 GiB
    VG UUID d2i9eU-4cXQ-cytm-dsLG-EOzb-1e6M-AkjKIb

  4. Let us create a logical volume now.
    # lvcreate --name testlv --size 5G testvg
      Logical volume "testlv" created.

    Let us check out our LV
    # lvdisplay
    --- Logical volume ---
    LV Path /dev/testvg/testlv
    LV Name testlv
    VG Name testvg
    LV UUID ZSrEP2-ibK6-wrbq-8ckc-5SxL-WppL-4QY3Sq
    LV Write Access read/write
    LV Creation host, time localhost, 2015-10-22 18:34:57 +0000
    LV Status available
    # open 0
    LV Size 5.00 GiB
    Current LE 1280
    Segments 1
    Allocation inherit
    Read ahead sectors auto
    - currently set to 8192
    Block device 253:1

  5. Our volume group is ready. Let us create a filesystem on that. For most of the regular usage, ext4 is a reasonable choice.
    # mkfs.ext4 /dev/testvg/testlv
    We can mount it and use it now.
How to extend LVM or add disk to LVM Partition?
LVM offers flexibility of letting us add the disk over a period of time without the need of taking down the current processes that might be using the disk. So let us see how to add a new disk and extend the logical volume. Check out the steps 1 and 2 from "How to create a LVM?". They are the same for adding a new disk to a LVM.
  1. Once we are done with the first two steps, we got the disk added in the PV. Now let us extend the volume group.
    # vgextend testvg /dev/sdc1
    Volume group "testvg" successfully extended
  2. After extending the volume group, we need to increase the logical volume.
    # lvextend /dev/testvg/testlv /dev/sdc1
    Size of logical volume testvg/testlv changed from 5.00 GiB (1280 extents) to 9.00 GiB (2303 extents).
    Logical volume testlv successfully resized
  3. Once we have more space in the partition, we can extend our filesystem to claim that space.
    # resize2fs /dev/testvg/testlv

Saturday, May 9, 2015

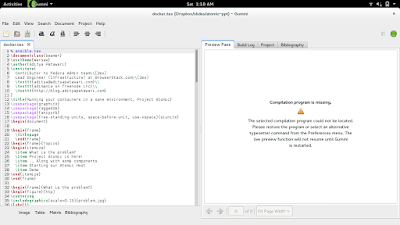
Fixing Gummi "Compilation program is missing" error

I use LaTeX, mostly beamer, for my slides. I really like the Warsaw theme and it has been the default for almost all my presentations since quite some time now. Gummi is my choice of editor for this since it is dead simple and I can see the preview as the slides develop in the side pane.
However installing Gummi in Fedora never pulls all the dependencies for me. So I always get a compilation error on a fresh installation. In this tutorial I am going to write about how to setup Gummi to fix that issue.


Step 1: Install Gummi
# yum install gummi

Step 2: Install compilation tools
# yum install rubber latexmk texlive-xetex

Step 3: Install beamer for the warsaw and other themes
# yum install texlive-beamer

Step 4: For presentations, I usually need SI units.
# yum install texlive-siunitx-svn31333.2.5s

And this is about it!

Saturday, April 25, 2015

Setting up Yubikey for SSH two-factor with public key authentication

I just bought a Yubikey Neo. It is a tiny usb device which can be used for multi-factor authentication with many application. But setting it up can become tricky at times due to lack of documentation. Here is what I did to setup ssh with Yubikey two-factor for my Fedora 20 and Fedora 21:

Step1: Install the pam module for yubikey auth.
# yum install pam_yubico

Step 2: We need to create a mapping of user and the yubikey associated with it. We'll need the key id of the yubikey. To obtain that, we just need to open any text editor, plug the key in a usb slot and touch the golden button on the Yubikey. The first 12 characters is the id. Also note that, there can be multiple keys associated with one user. We'll create a file /etc/yubi-map:
# cat /etc/yubi-map
aditya:scwechdueeuv

Step 3: Now we have to add the yubico pam module to the sshd auth. Change the /etc/pam.d/sshd so that first few lines look like this:
#%PAM-1.0
auth       required     pam_sepermit.so use_first_pass
auth sufficient pam_yubico.so id=1 authfile=/etc/yubi-map debug


Note that I have added the pam_yubico as a sufficient auth and also modified the pam_sepermit to use the user's initial password.

Step 4: We'll modify the /etc/ssh/sshd_config to allow challenge response and define the authentication method.
ChallengeResponseAuthentication yes
AuthenticationMethods publickey,keyboard-interactive

Optionally, disable the password auth as well
PasswordAuthentication no

Restart the sshd.
# systemctl sshd restart

Step 5: Now, here is the real catch. Yubikey needs to contact an authentication server before it can process. As far as I understand, we cannot use Yubikey when there is no internet (alternatively, you can run an authentication server in your own infra but more on that later). This also creates a problem, which is, that SELinux denies any network request during authentication. To handle the situation, Yubikey docs suggests setting a boolen.
# setsebool -P authlogin_yubikey 1

Wednesday, March 4, 2015

How to check for SSL FREAK Vulnerability?

A research group named SMACK has released a vulnerability known as FREAK which can be used for man-in-the-middle (MITM) attack. The vulnerability is due to an old ghost created by USA Government (NSA, more specifically) where in, years ago, they convinced several organizations to use weaker keys, known as export-grade keys for any software that was to be used outside the borders of USA. While the use of strong keys is wide spread now, several servers still have support for the weaker keys.

The group discovered that this vulnerability can be exploited by using a client and making a connection via a weak key. Once the key is generated by the server, it is reused until the server is restarted which can potentially be months. The group was able to crack this weak server key in 7.5 hours using Amazon EC2. Once this is cracked, potentially all the communication can be downgraded to use weak keys and MITM'ed.

How to check if a server vulnerable or not?
Fire the following command:
$ openssl s_client -connect www.google.com:443 -cipher EXPORT

A handshake failure signifies that EXPORT cipher is not active on the server and it is safe.

Hacker News: Discuss and upvote on Hacker News.

Monday, January 5, 2015

Basic Docker Orchestration with Google Kubernetes on Fedora

Kubernetes is new framework by Google to manage Linux container clusters. I started playing with it today and it seems like a cool, powerful tool to manage a huge barrage of containers and to ensure that a predefined number of containers are always running. Installation and configuration on Fedora and many other distributions can be found at these Getting Started Guides. I recommend using two machines for this experiment (one physical and one VM is fine). Kubelet (or Minion) is the one where Docker containers will run, so use more powerful machine for that.

After the installation we'll see something like below when we look for minions from kube master:
master# kubectl get minions
NAME                LABELS
fed-minion          <none>


Now we would move to Kubernetes 101 Walkthrough where we will run a container using the yaml from the Intro section.
master# kubectl create -f kubeintro.yaml

.. except, (as on 25 Dec 2014) it won't run. It will give an error like this:
the provided version "v1beta1" and kind "" cannot be mapped to a supported object

Turns out that a field "kind" is empty. So the kubectl won't be able to run the container. Correct this so that kubeintro looks like this:

master# cat kubeintro.yaml
apiVersion: v1beta1
kind: Pod
id: www
desiredState:
  replicas: 2
  manifest:
    version: v1beta1
    id: www
    containers:
      - name: nginx
        image: dockerfile/nginx


Optional: Now, I do not exactly know what is there inside the image "dockerfile/nginx". So I would replace it with something that I want to spawn like "adimania/flask" image. The dockerfile for my flask image can be found in Fedora-Dockerfiles repo.

Once the kubeintro.yaml is fixed, we can run it on the master and we'll see that a container is started on the minion. We can stop the container on the minion using docker stop command and we'll see the kubernetes will start the container again.

The example above doesn't do much. We need to publish the ports of the container so that we can access the webpage served by it. Modify the kubeintro.yml to tell it to publish ports like this:

master# cat kubeintro.yaml
apiVersion: v1beta1
kind: Pod
id: www
desiredState:
  replicas: 2
  manifest:
    version: v1beta1
    id: www
    containers:
      - name: nginx
        image: dockerfile/nginx
        ports:
          - containerPort: 80
            hostPort: 8080


Now delete the older pod named www and start a new one from the new kubeintro.yaml file.
master# kubectl delete pod www
master# kubectl create -f kubeintro.yaml


We can browse via a browser to localhost:8080 and we'll see Nginx serving the default page. (If we would have used "adimania/flask" image, we would have seen "Hello from Fedora!" instead.)

If you need any help with managing kubernetes, checkout my consulting services.